Monday, March 11, 2013

Fabulous Fandom Mashup Embroidery

When Jen posed a mashup challenge to all of us Fandom in Stitchers, I knew what I had to do!


I ended up winning the challenge! :D

Here is my initial sketch, done of the scrap of paper where I printed off the description of the sitting room at Spinner's End from HBP:

 photo spinnerssketch_zpsa110b498.jpg

I ran out of time to do the Oriental rug, but overall I think I got the gist of it. Originally there was to be a certain Professor's wand and a cup of tea on the "rickety table," but the sonic screwdriver got left there instead.

Here is an action shot of the Work in Progress:


 photo spinnersendIP_zpscbf718a4.jpg

I used tissue paper transfer to get Soma's wonderful TARDIS pattern just right, as well as the shape of the chair. Everything else I freehanded with chalk.

And do you wanna see the back? It's a hot mess!
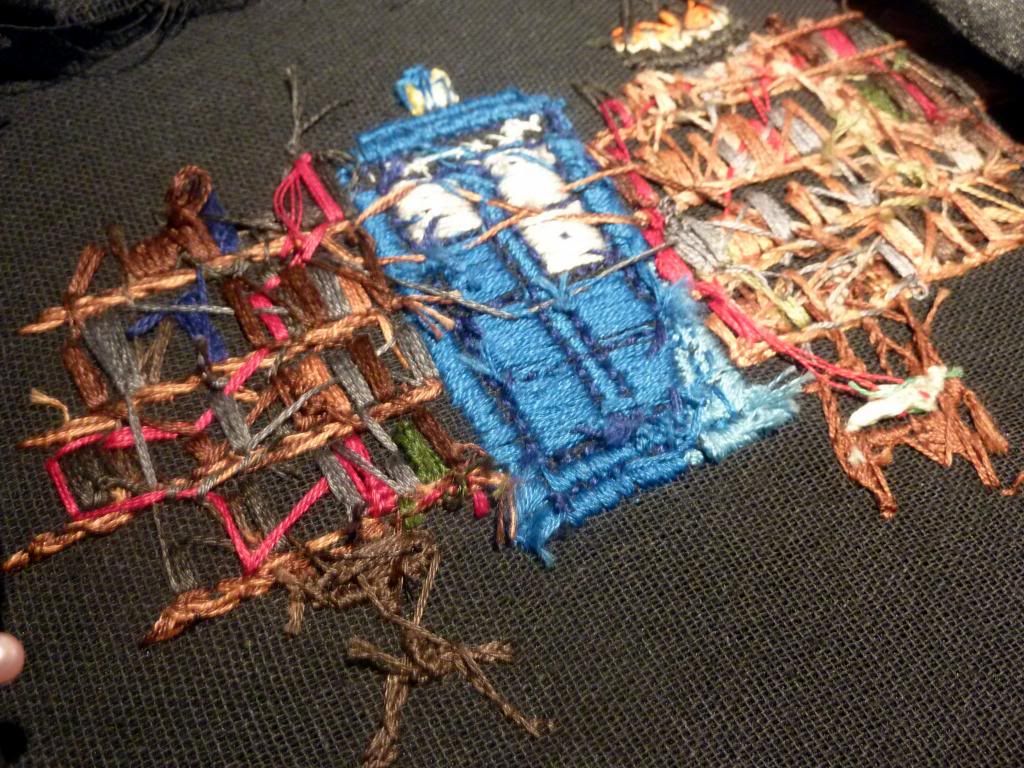


And a few closeups, as requested by the fabulous Soma herself:


 photo spinnersend6_zpsd674851c.jpg

The Sonic Screwdriver is simply 1 bugle bead and 2 seed beads!


Safe to say I ran out of blue floss after the TARDIS was done.


 photo spinnersend5_zps5f07e35c.jpg

Here is the Professor's threadbare chair, worked in satin, chain, and bullion stitch.


 photo spinnersend4_zps51734883.jpg

And here is the "candle-filled lamp" as I saw it in my head.


Thank you, as always, to Jennifer at FiS for motivating us all to make our fandom daydreams come to life!

Sunday, February 17, 2013

Doctor Who Embroidery Tutorial

Here is an embroidery project for the Whovians among you!

(Spoiler alert - if you are a new fan and haven't gotten to A Good Man Goes to War, this project will totally spoil that episode for you.)

Cross-posted at Fandom in Stitches...

Tutorial after the jump....spoilers, sweetie!


Saturday, November 24, 2012

The Fourth Doctor Mug Rug

Here is a quick project I wanted to make for my friend Jewells (her blog is here). This lovely lady, whom I met through the fabulous TTMT community, has sent me care packages full of crafty goodies which both my daughters and I always thoroughly enjoy.

I happen to know that she is a loooong-time Dr. Who fan, and I believe Her Doctor is #4. So, what to do? A mug rug, that's what.

Photobucket


These are two patterns from Fandom in Stitches. Halves of two patterns, actually. The Doctor's scarf is the lower half of Cat's 'Torn Ribbon' pattern, and of course the half-TARDIS is Jen's TARDIS, version 2. I have not seen the older incarnations of Dr. Who (like so many others, I started with Ecclescakes), and I'm pretty sure his scarf was never flying out behind the TARDIS, but what the hey. You get the idea.

Enjoy your cuppa, Jewells! :)

Saturday, November 3, 2012

Moroccan Caftan Embroidery

Here is another 12-for-2012!


This is a gift for my mum, it's just waiting for a frame. The design is from a line-art drawing from Islamic Designs by Diane Victoria Horn. It's a ceremonial caftan and belt from 19th century Rabat.

Since it started as just a line drawing, I decided to make it into a sort of sampler, trying all kinds of stitches that I'd never done before. It's worked on a poly blend "silk shantung", backed with muslin. Worked in chain, stem, straight, buttonhole, fern, bullion, and satin stitches. Here are some pictures of the process.

The original design, traced using water-soluable ink:


There are babouches, or slipper-type shoes, in the original design. I tried to include them but they just never looked quite right.

I basted muslin around the edges to fit the piece nicely into a hoop. Here it is in the beginning, in summer!


I wanted to try a blackwork design for the belt, so I first drew in a grid to use as a guideline:


And here are some detail shots of the final piece:


A few new stitches under my belt! Success!


Friday, November 2, 2012

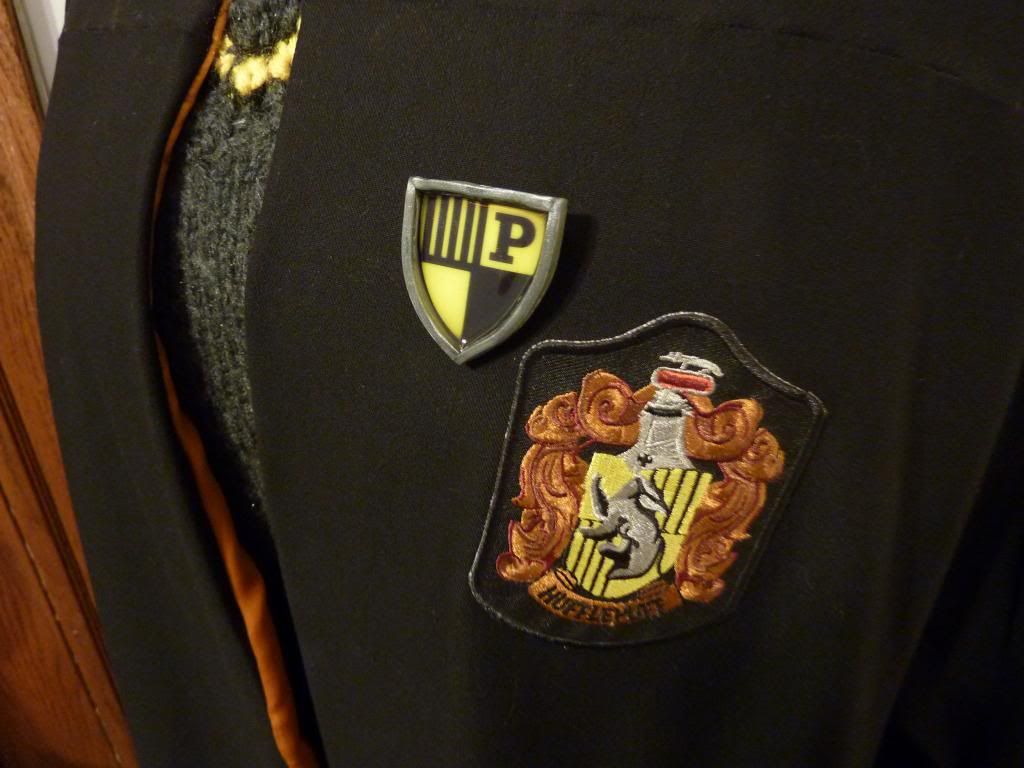
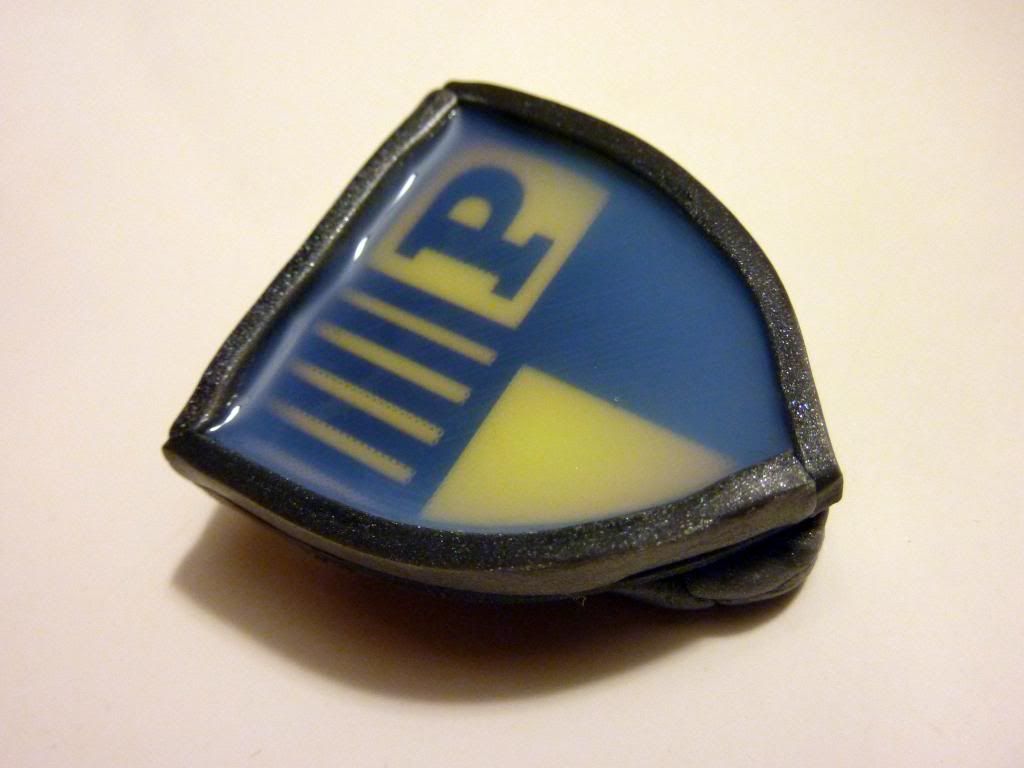
Prefect Badge How-To

I haven't quite decided if I'm prefect material.

For those days when I'm feeling especially prattish exemplary, I have made myself a badge.


It's kind of what I envisioned, minus the slabs-of-polymer-clay-stuck-together look.

Here's how I did it, and if you're more proficient with polymer than I am, you can smooth out the seams to suit your tastes.

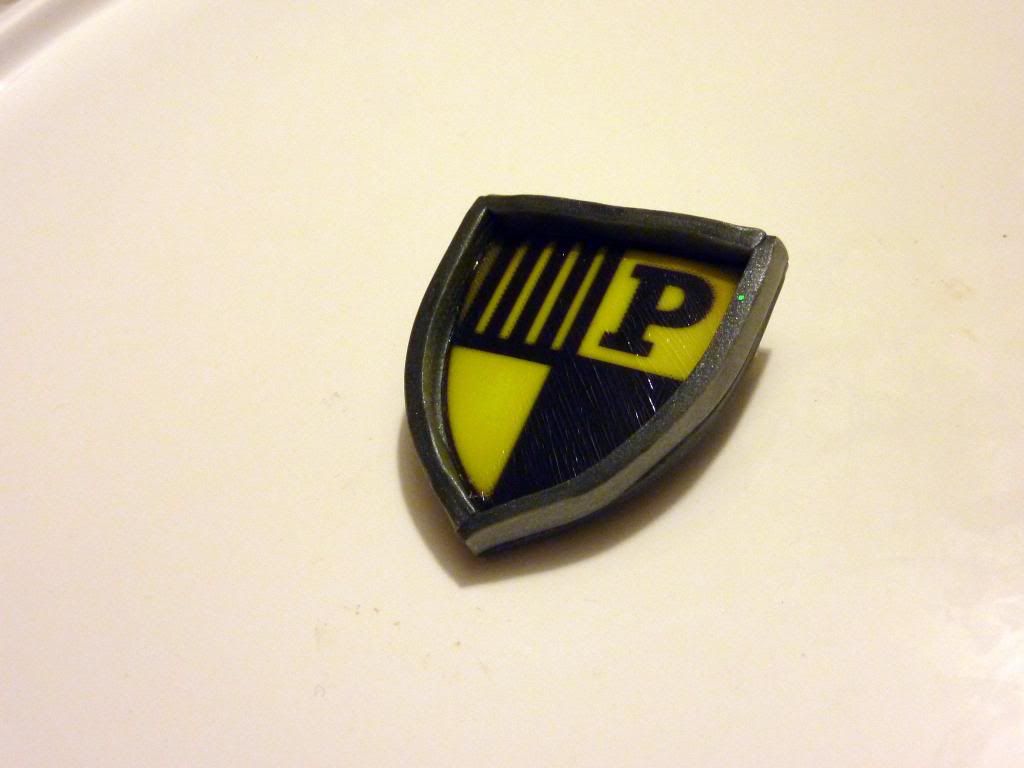
It's a basic tray setting, into which I secured a printed prefect design (I designed mine in Inkscape), and sealed with resin.

You'll need the following:

  • silvery polymer clay (I used Premo!Sculpey Accents in Silver)
  • a pin back finding
  • jewellery glaze or resin (I used Diamond Glaze)
  • sealer (I used ModPodge)
  • jewellery glue (I used E-6000)
  • printout/drawing of your house prefect design

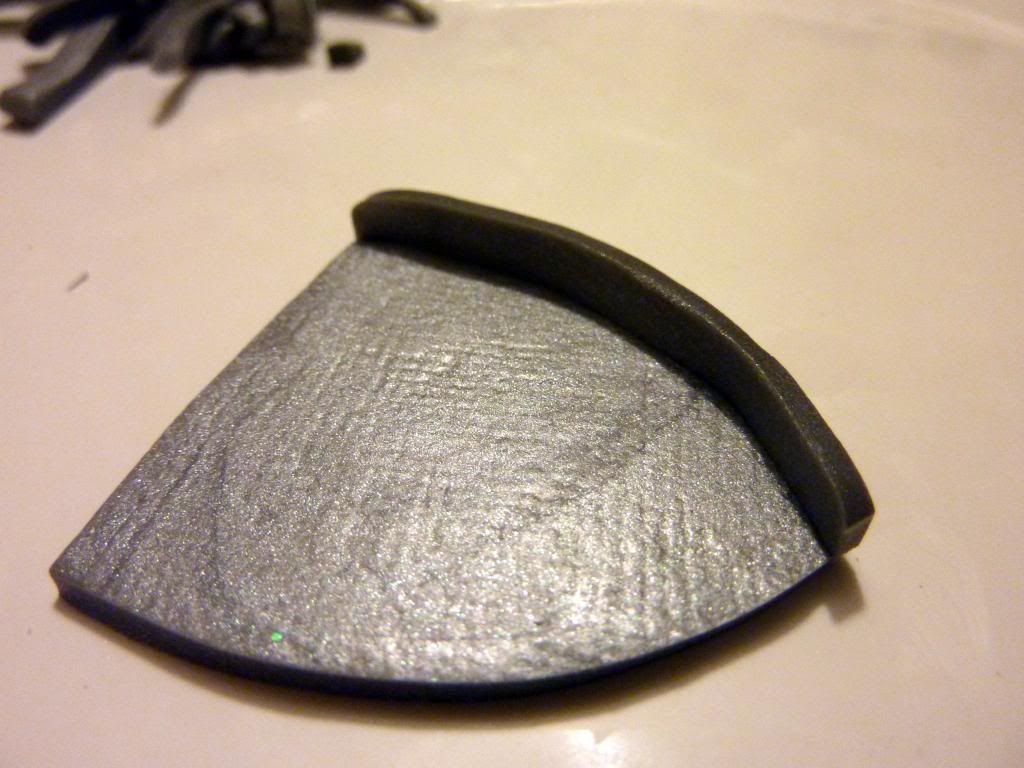
1. Cut out the design of your choice. Roll out the clay to a uniform thickness (mine is a little less than 1/8" thick). Use your cutout as a pattern for the base of your setting, cutting around the basic shape and leaving 1/8' 'seam allowance' for the walls of your setting. Cut strips of the rolled polymer for the walls. I eyeballed mine, but I just measured and they're 3/16" high. Attach the walls, trimming as you go, around the edge of the base.


2. After all the walls are in place, bake as directed.

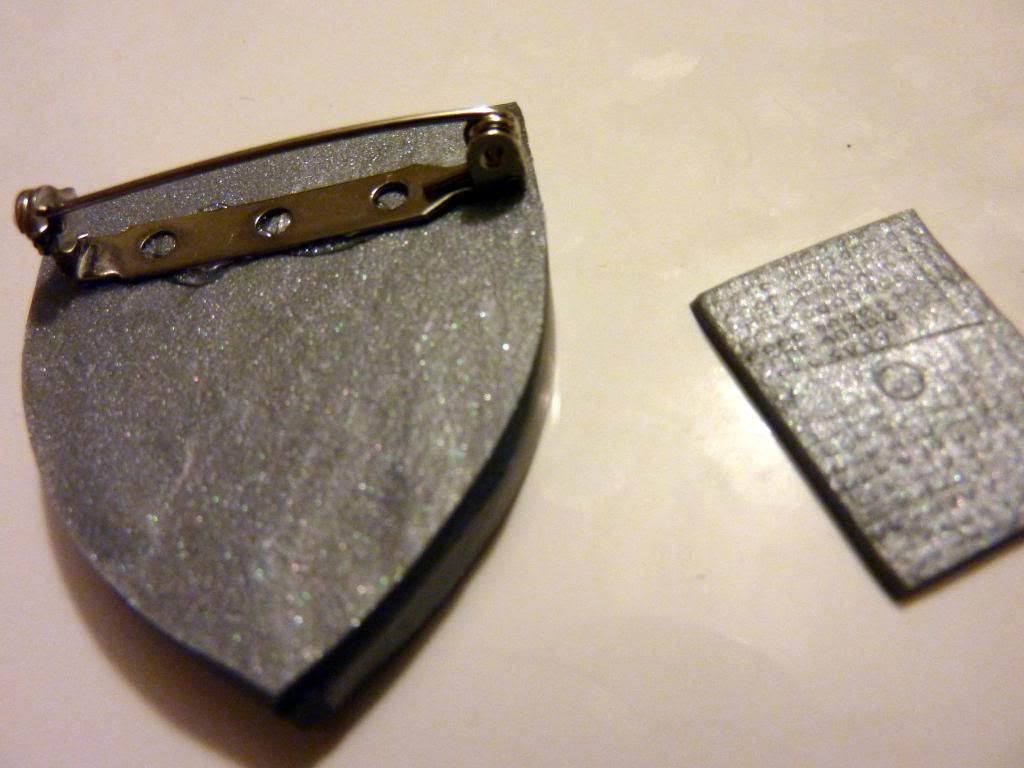
3. After clay has cooled, attach pin finding with jewellery glue. Allow to cure.

4. For added security, make a 'band-aid' of polymer - just a rectangle - and attach over the bottom of the pin finding. Rebake your badge.


5. Seal both the front and back of your paper design with sealer. Let dry, then glue to the inside of your setting, trimming if necessary.


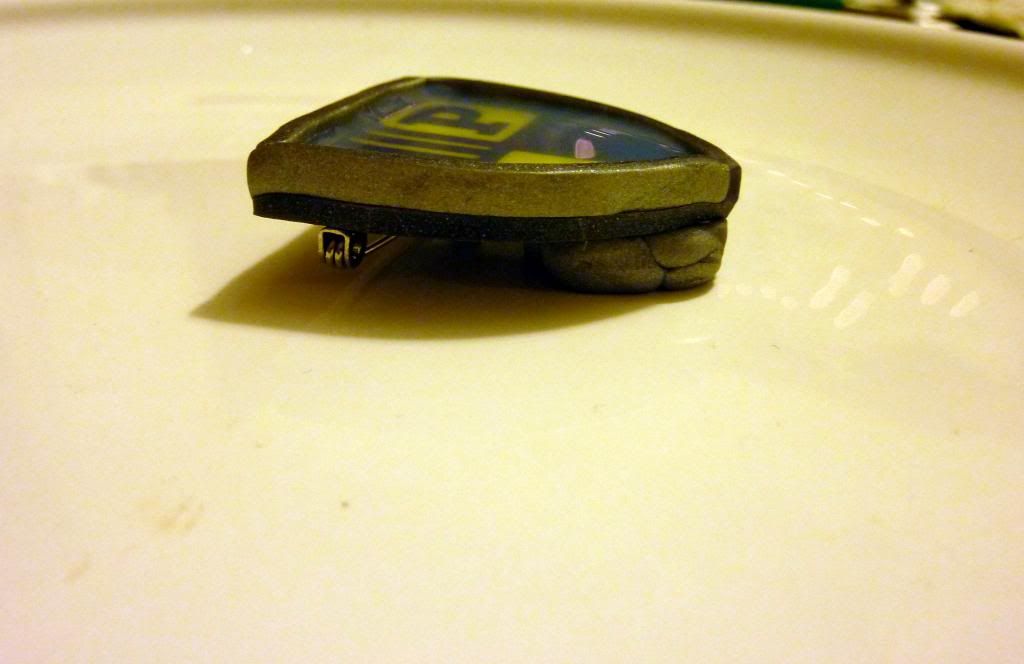
6. Before you add your resin, you have to make the setting level. Use a scrap lump of clay under the bottom of the badge to raise it to level.


7. Pour in a thick layer of resin, following your manufacturer's directions.


8. Allow to cure, again following your manufacturer's directions.

Enjoy being a prefect! :)

Monday, October 29, 2012

Hufflepuff Charm Bracelet, and a Wand Charm How-To

When it rains....

Here's another recently finished project.

I LOVE charm bracelets. Here's one that's inspired by the storyscape inside my head, but I'll try to explain it the best I can. :)


Obviously, it's HuffliePufflie. Black and yellow beads throughout. Glass and stone both. The black hearts are hematite, one of my favourite stones.

I have a story going in my mind (I hesitate to call it fanfic because of what's been associated with the genre as of late, but that's what it is. Purely prudish, I swear.) Keys are a big theme in my story, figuratively and literally, so I've been accumulating key charms for awhile, anticipating assembling this bracelet. Plus, I LOVE keys. I've gotten some beautiful key charms from friends recently, so those went into the bracelet as well.

The character in my story is an avid embroideress with a sweet tooth, so there are golden embroidery scissors and a wrapped candy (the only pre-made charm on this bracelet).

Obviously again, it Snape-tastic. Potion bottles filled with glitter Veritaserum and Draught of Living Death. There is a polymer-clay bit of "parchment", for which I used Premo! Granite Grey and a rubber stamp with calligraphy. In the middle of the bracelet is a polymer-clay wand charm, which is quite quick and fun to make:

You'll need polymer clay in your wand colour of choice and an eyepin in your wand length of choice.

Roll out the polymer thinly (sorry I have no measurements, but you'll be wrapping this around wire, if that gives an idea of how thin to go).

Cut a rectangle large enough to accommodate the length of the eyepin, and place the eyepin at one end with the eye hanging off the edge:


Roll up the clay, trimming so that you get a butted edge where the clay joins. Smooth the joint and roll the wand until you have the diameter and tapering you want. You may need to trim some off the end and re-roll to get the desired thickness.


Add embellishments and bake! Not for too long, though. These are tiny.


That's it! This bracelet was one of my 12-for-2012 projects, and am I glad it's finally done!


Glass Dome Charms - A Common Sense How-To

I probably just don't know where to look, but while I was figuring out how to make the glass dome charm/pendant for the swap on the last post, I couldn't find any online tutorials. It seems pretty straightforward, but I ran across a few pitfalls as I proceeded, so I'll just post a quick how-to for anyone trying this fun project for the first time.

I got a mixed lot of kits from eBay, each kit including the setting and the matching glass dome. In these photos, you'll see a project I made for my friend Kristel, whose blog you can visit here. :)

The biggest mistake I made was reading the "Safe For Photos!" blurb on the E-6000 adhesive. I didn't think I'd have to seal my printout of text on "parchment" style paper, but I was wrong. The original was completely blotchy and translucent where the glue seeped through.

Lesson: Always seal. Both sides. Front and back.

I use Mod Podge and it's been working just fine.

Cut out a rough shape of the printed matter you want under glass. Seal the front with one layer of your sealer, let dry. Then seal the back.


Using your adhesive, glue the glass dome to front of printed piece.


Cut paper around glass dome with a craft knife and file edges at about a 45° angle to get a nice bevelled edge, so that no paper is hanging out around the edges of the glass. (I used a nearby nail file.)


Photobucket


Photobucket


Use your adhesive (a smallish dab so that it doesn't ooze out from the edges) to attach your dome to your setting. Let dry as directed.


And here is the final product, a bookmark with beads and charms, and a glass dome bit!


Easy, fun, and pretty quick if you know how to go about it!